I often see photographs that I think are really good, except there is this or that distracting element in it. Since I am not a photojournalist, I try to remove distracting elements before I take the photograph, either by changing my camera angle or position or just physically removing the item. But sometimes that approach is just not possible.
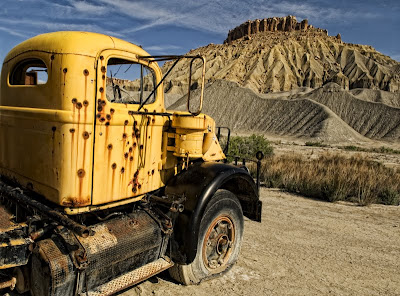
In my crop, I wanted to keep the curvature of the truck cab and the truck’s back window, so I was forced also to keep the tank in the left corner and the piece of wire basket behind the truck cab. To me, both are distracting elements within the photo and, therefore, must be surgical removed. If the elements to be removed are small, I will use Lightroom’s clone or healing tool; but, in this case the items are large so I will use the cloning tools in Photoshop to remove them.
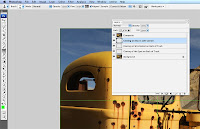
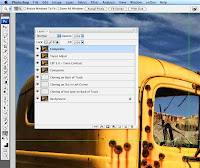
When I clone is Photoshop, I clone my changes onto a new layer. I usually use a new layer for each area that I am cloning so that if I make a mistake, it will not destroy any of the work I have already done. When you clone onto a new layer, you do need to make sure that you use “sample current & below layers”.

As I mentioned on Monday, I remembered a lot more detail in the scene. Details can be added a number of ways in Photoshop—sharpening, adding contrast, etc. Since I am lazy, I use two Photoshop plug-ins to accomplish this task—nik Color Efex Pro (tonal contrast or pro contrast filters) or Topaz Adjust. Barry Armer has been using Topaz Adjust for a long time and I have been impressed with the results that he has gotten using it. I recently purchased it and to date, I like it very much. Because the filters are very quick to run, I will usually run both of them on different layers and then select the result I like best.

For this image, I think the Topaz adjust did the better job so I used it.
In my layers pallet, you will notice layers titled “Composite.” These are layers that are combination of all the layers below it. In Photoshop, you can make composite layers by holding the ALT key down and then going to Layers>Merge Visible.
Enjoy and don’t forget to ask any questions you might have along the way. I will do my best to revise my next posting to accommodate the questions this week.
Post Processing in Photoshop—Cloned a few distracting elements and used nik Silver Efex Pro Tonal Contrast filter and Topaz Adjust to add contrast to highlights, mid-tones and shadows

You've done a bang up job fixing the problems Larry. The tank and wire basket were distracting elements for me. I also like the Topaz Adjust filter as you have used it. Sometimes it's used improperly and this is a nice touch.
ReplyDeleteI like the procedural version of the blog at this point in time. It lets you get your teeth around your actual workflow in processing photos. Many people struggle with using LR2 and PS and don't really know where to start. Keep it up.
DHaass
I'm really enjoying this workflow series Patrick! It's interesting and informative to see how someone else approaches post-processing! And thanks for taking the time (it must have been a least a little tedious) to put it together and post it!
ReplyDeleteYou started out with a great capture and every post-processing step you've made so far has made it even better! I'm really look forward to seeing the remainder of the process and the final image!
Cheers!
Barry
Again, cool presentation. I like how you included the layers that you used in Photoshop. It helps me better understand what you have done.
ReplyDeleteTed
Major improvement with the photo in a few steps. I like your inclusion of the layers. I think it adds a lot to the flow of the blog. I would like to know about how much time you have spent on the photo so far and in the end?
ReplyDeleteMel
Enjoy what you are doing but am curious as to what you will do on Thursday and Friday. Thanks for the help.
ReplyDeleteJeff